|
|
||||||||||||||||||||||||
|
|
||||||||||||||||||||||||
|
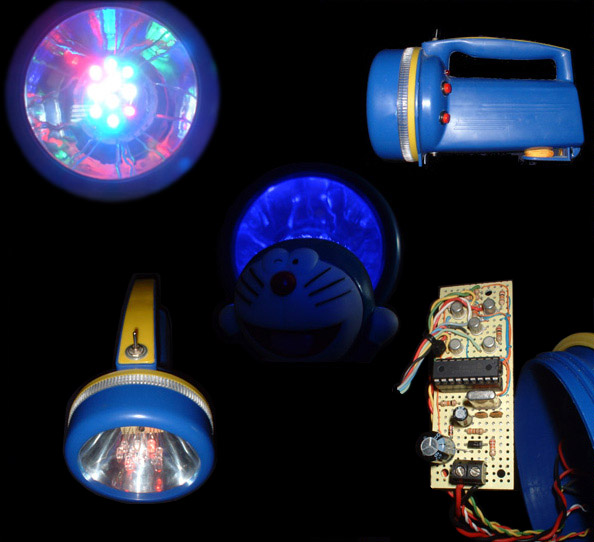
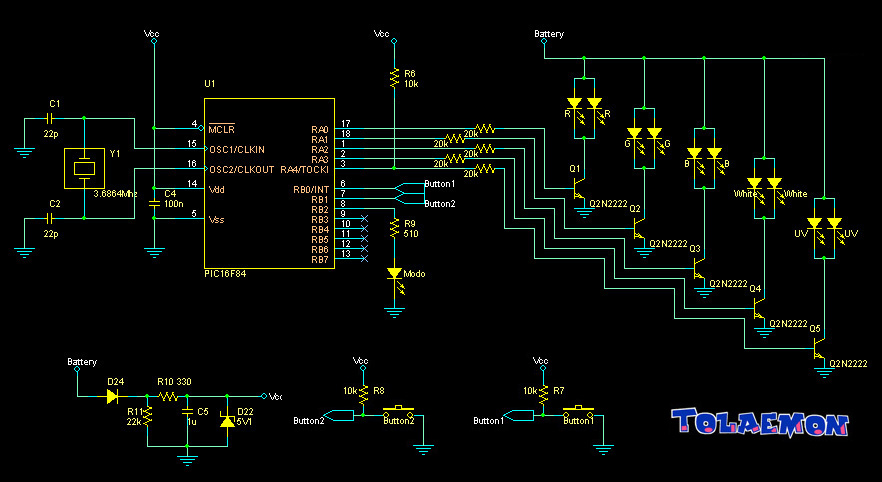
I developed this project in order to learn more about PIC microcontrollers, especially with PIC16F84. This torch has 10 Leds conected to 5 port A pins, each pin has 2 leds of the same colour conected to it : 2 red, 2 green, 2 blue, 2 white and 2 UV. So they are grouped in pairs of the same colour, and each of these pairs is contolled with a transistor working in switching mode. Transistors are used to avoid overloading the microcontroller's ports, because each port can sink a maximum of 20 ma and it's not enough to feed each pair of leds, which needs 40 ma. Each color intensity is regulated controlling the duty cycle of a 40hz square signal that activates Q2N222A transistor base. This means that that modulating the width of each pulse will chage birghtness of the leds. In fact it works as a software pulse width modulator (PWM). The intensity of the light and its consumption is proportional to the number of LEDs that are ON and each one's duty cicle:
As you can see one of the most important adavantatges of this torch is the low current consumption compared to conventional torches: all energy is converted to light. Another advantadge is that It can make any colour you want, you only have to configure the right RGB W-UV combination. It has other functions like a blinkning configurable frequency, and an option to save your favorite RGB W-UV color into EPROM and therefore restore it at a later date. All this funcitons are controlled only with 2 buttons. As chasis I used a torch wich I bought for 2 Euros in the supermarket. These are some pictures of Cleverlamp: |
||||||||||||||||||||||||
|
|
||||||||||||||||||||||||
|
|
||||||||||||||||||||||||
|
|
||||||||||||||||||||||||
|
|
||||||||||||||||||||||||
|
. . . Label, Program & Audiovisuals (c) Tolaemon
2004. . .
|